
What Do IPX Ratings Mean For Electronics

Electronic or not, gear built for outdoor emergencies must be able to withstand the elements. That’s where IPX ratings come in. You may have been shopping for anything from a head lamp to a smart watch and encountered this term.

IPX ratings let you know how water resistant an item is or is not. They range from 1-9 and this is how they work:

IPX 1 is safe from dripping water when held vertically 

IPX 2 is safe from dripping water at a 15 degree tilt

IPX 3 from spraying water at an up to 60 degree tilt. 

IPX 4: is safe from splashing water (not immersion) from all directions. This is where it where it gets safe to carry the item in the rain.

IPX5:  is safe from low pressure water jets, and IPx 6 from high pressure water jets and hard rain

IPX 7 is where it starts to get good, it is safe for immersion in up to 3’ of water for up to 30min

IPX 8 can be emerged in deeper waters for longer persons of time, as specified by the manufacturer. This is when you can use the item for water sports like swimming. 

IPX 9: is an odd one, it’s good for high pressure high temperature jets, like those intended for industrial cleaning.

Now this is sometimes in coded with a dust rating which is great. If you see two numbers after the IP that’s what it means

A FIVE MEANS DUST RESISTANT, a 6 means dust proof. The dust rating will be the first number, and the second number is the water resistance rating we just covered.

This emergency GPS beacon is rated IP68, which makes it dust proof, waterproof, and submersible, all great features for a personal locator beacon.

This message brought to you by Thomas Coyne Survival Schools. Want to learn more? Sign up for our online learning platform here: https://www.californiasurvivaltraining.com/survival-preparedness-group-copy
Wilderness Survival Water Essentials: Location, Purification, & Hydration

Though Water is a survival essential, locating it in the wild, making it safe to drink, and efficient ways of hydrating with it are commonly misunderstood. I hope this manual helped to clear up any misconceptions you may have had, and leads to a more effective skill set in outdoor survival.  Remember these 10 essentials:

1. Using plant indicators to spot “green belts” is the best way to find water in arid areas.

2. Proper Boiling times change based on your altitude. 1 minute at sea level, add 1 min per 1000 meter rise in elevation.

3. Boiling is effective against microbial contamination, but it is not adequate for chemical contamination such as that from harmful algae blooms.

4. The concern with algae blooms is chemical, not microbial. Boiling and ch tabs are not effective. Carbon capture can reduce the dangerous toxins (cyan-toxins) released by harmful algae (cyanobacteria).

5. A wilderness water filter should have .2 micron filtration or better.

6. The average adult male requires 3.7 liters per day and the average adult female requires 2.7 liters per day for adequate hydration. Plan accordingly.

7. Large volumes of sweat and water intake require electrolyte supplementation to avoid hyponatremia and maintain performance. 

8. Wilderness water filters and systems are not adequate for urban areas.

9. Harmful microbes are much more dangerous in urban water sources than wilderness. Protozoa may make you sick, but encephalitis can kill. Never drink water flowing through urban waterways untreated.

10. Distillation removes salt from saltwater. l and destroys dangerous microbes. You can distill water with a sheet of plastic and sunlight, or with pots and pans. 

For even more training, try our online survival training at: https://www.californiasurvivaltraining.com/survival-preparedness-group-copy

Fight, Flight, or Freeze. Heuristics & Stress Inoculation.

Fight flight or freeze. Which do you honestly believe you would you do if disaster struck? If it struck quickly, powerfully, and without warning. Everyone of us  has wondered, at least once, how they would handle a sudden emergency. What would I do, if I was in x, y, or z, situation? If I was attacked, if someone was breaking in my home, if a loved one suffered a sudden medical emergency before my eyes. How would I react? Would I make the right decisions?

Well believe it or not, there is both a science and a very specific methodology for ensuring you can. They are combined and employed by everyone from firefighters, to police officers,to soldiers, to engineers and doctors. In this blog and its accompanying video, I’m discussing heuristics and stress inoculation, and how they work together, to make you harder to kill in a survival situation. 

Let’s begin with hueristics:

Heuristics (as a subject matter) refers to the study and use of practical methods, rules of thumb, and mental shortcuts that enable problem-solving, learning, and decision-making when optimal or exhaustive methods are impractical. To make that a little more plain, You could say that Heuristics are mental shortcuts used to make judgments under uncertainty.

The practical uses of heuristics in sudden and dangerous emergencies are to;

  • Reduce cognitive overload

• Enable rapid decisions under uncertainty

In training it can also

• Provide workable solutions to complex problems

• Guide exploration and discovery

• Support adaptive behavior in dynamic environments

Heuristic Methods in Problem-Solving

Common heuristic strategies include:

• Trial and error

• Working backward

• Simplifying the problem

• Pattern recognition

• Rule-of-thumb estimation

• Analogy-based reasoning

The Availability Heuristic:

Now here is where stress inoculation can come in.  Stress inoculation, much like heuristics, can help us reduce the chance of cognitive overload in a sudden emergency. It can prevent you from freezing, and help quickly guide you as to whether fight, flight, or some combination of both are appropriate.

Stress inoculation, when trained properly, can fill your availability heuristic with useful memories and responses, especially trained responses.

Now, you don’t want to just do whatever ooos in your head. If your availability heuristic isn’t trained through stress inoculation, it can lead to these types of troubles;

• A cognitive bias where people assume that if something can be recalled quickly, it must be important or frequent.

  • Causes: Memorable, recent, or emotional examples (e.g., plane crashes, news, shark attacks) are recalled faster, skewing perception of risk or frequency.

  • Impact on Decision-Making: It often results in distorted risk assessments, such as fearing rare, sensationalized events more than common ones.

  • Overcoming the Bias: Individuals can overcome this by seeking out objective data, statistics, and different perspectives rather than relying on immediate mental examples. 

FOR A GREATER UNDERSTANDING OF HOW THESE CONCEPTS WORK TOGETHER, CLICK HERE TO WATCH MY VIDEO BREAKDOWN

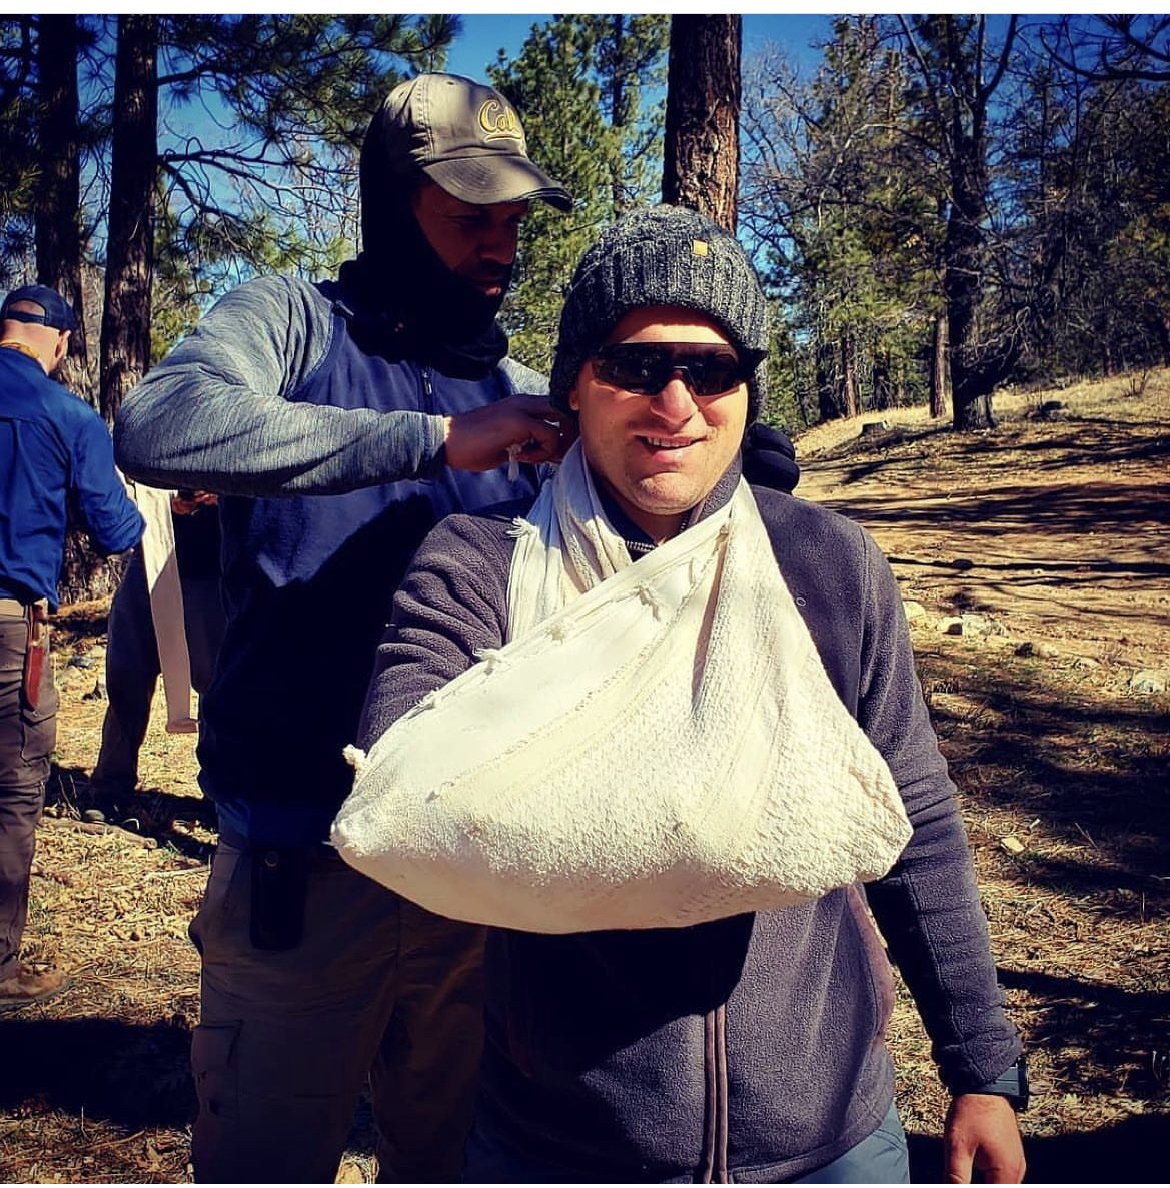
Improvised Shoulder Splints/Slings: Treating Damaged Limbs In The Field

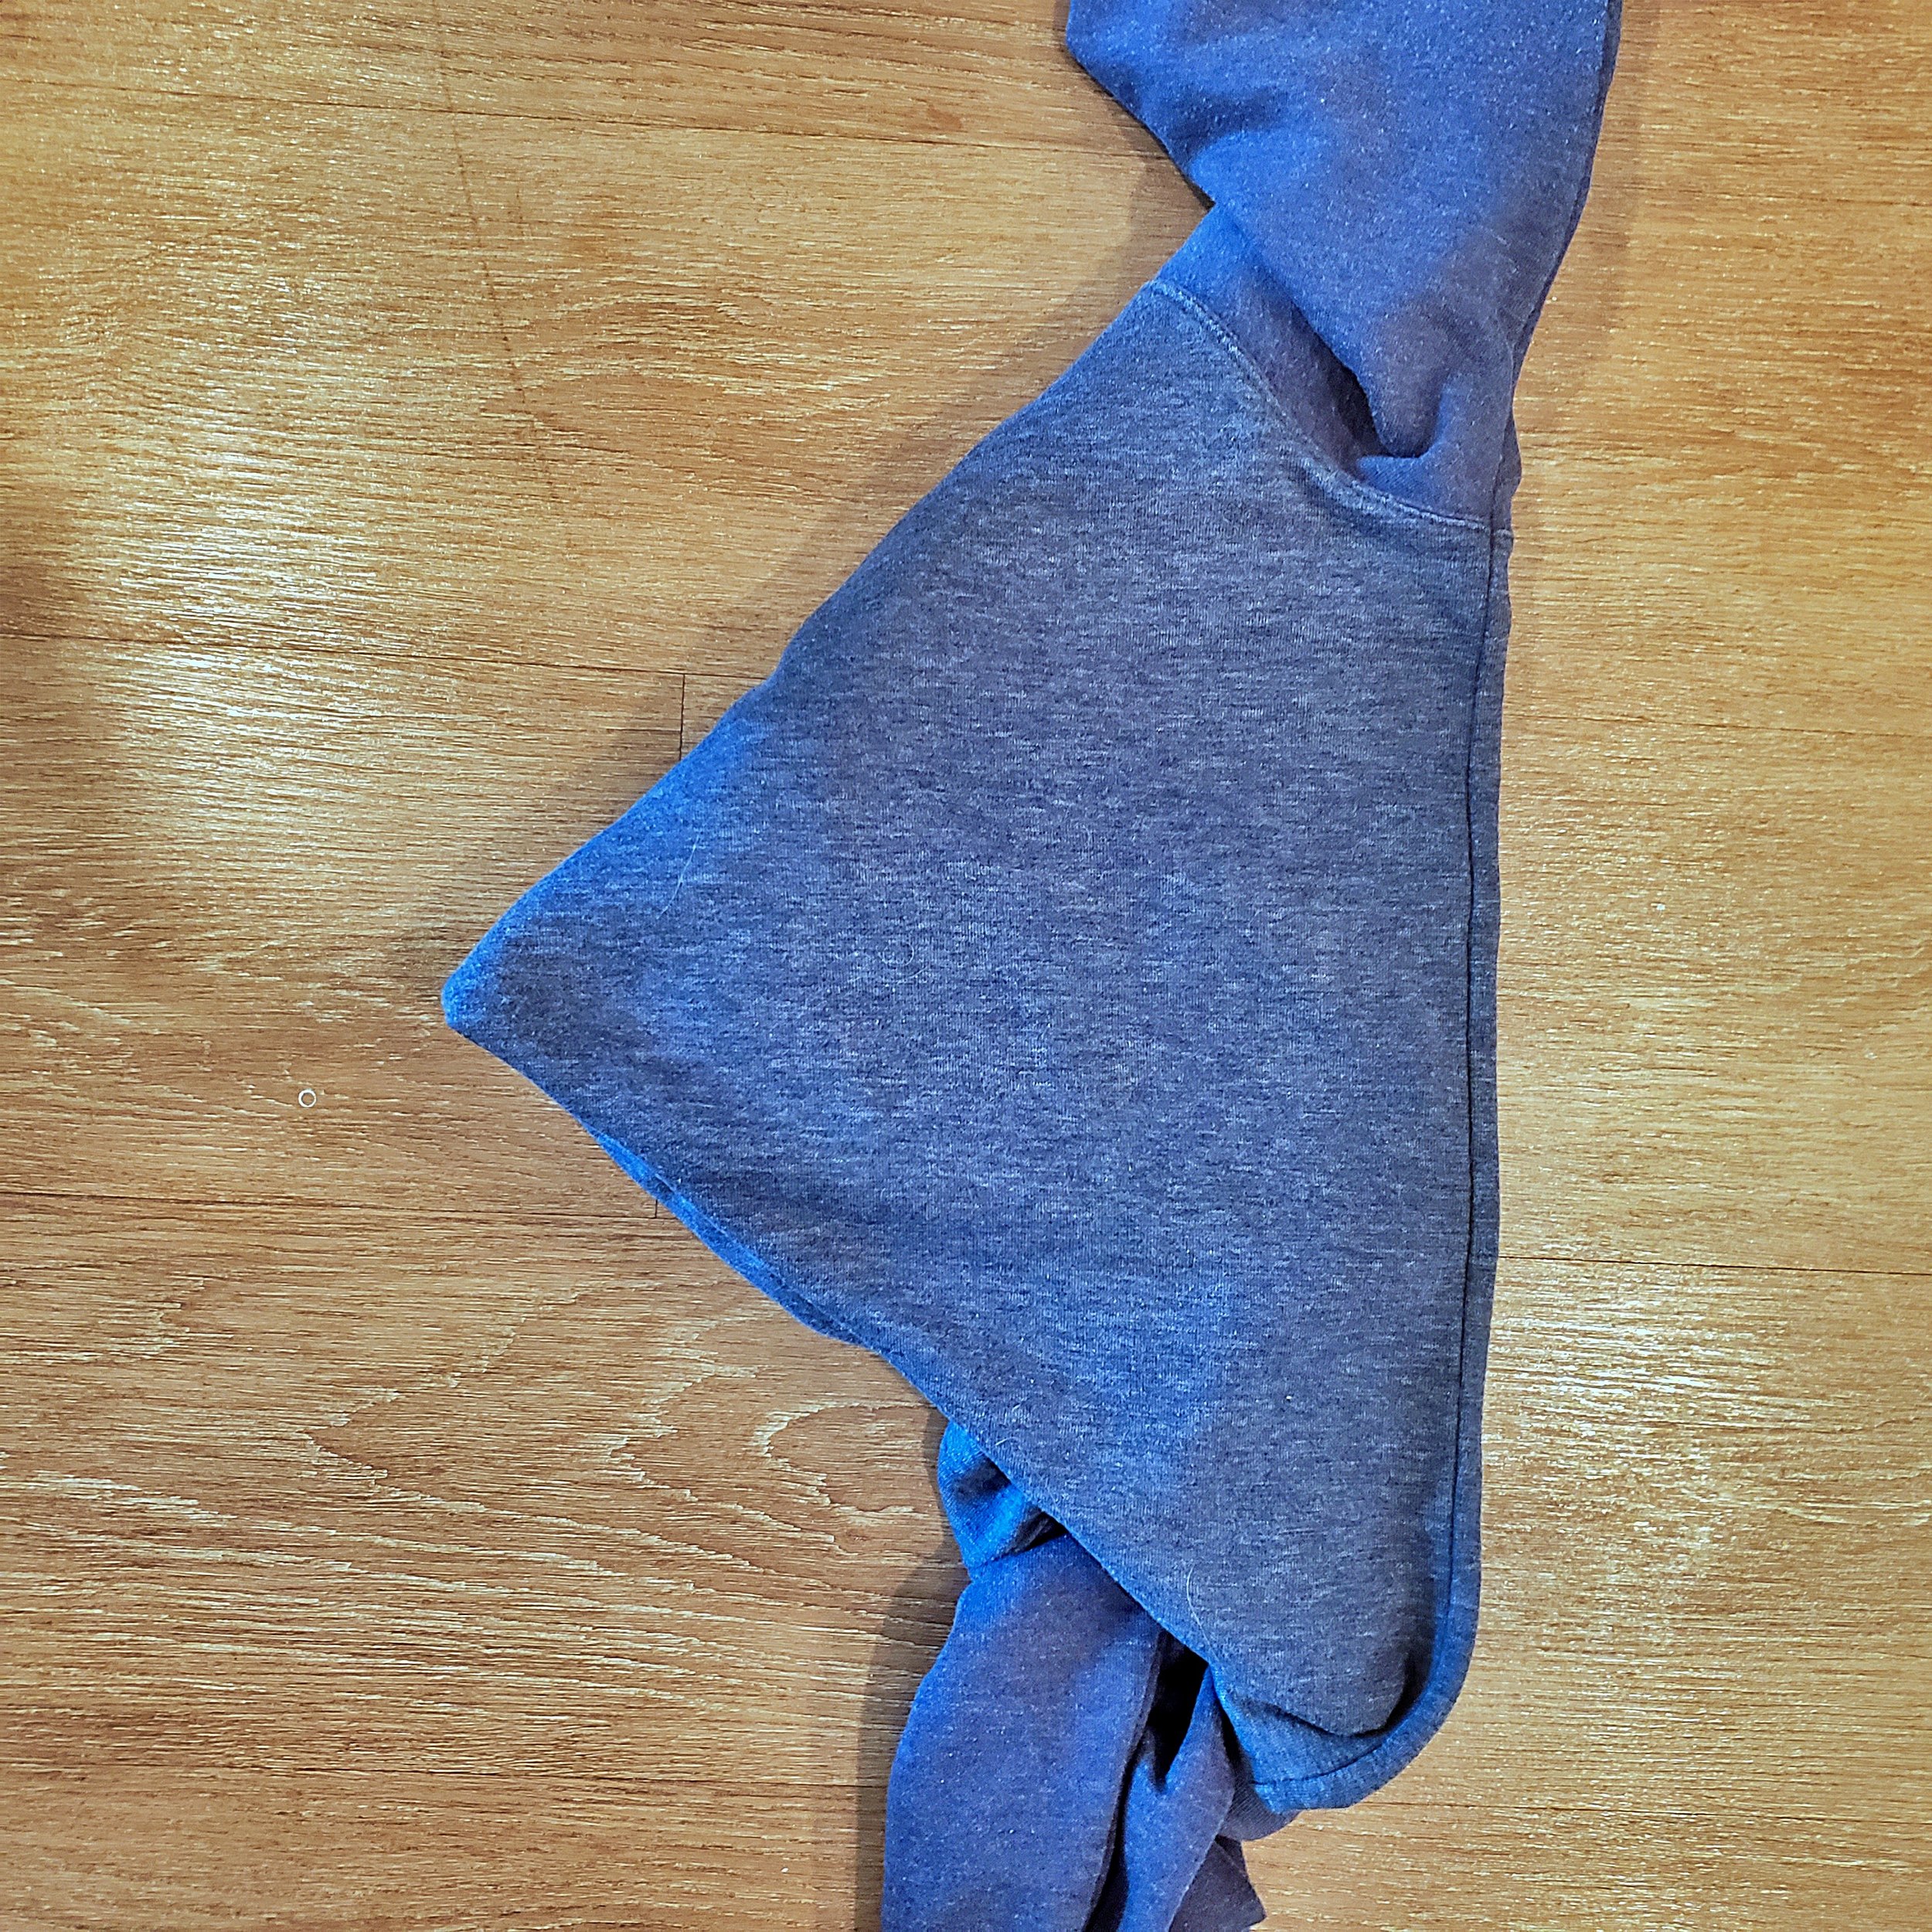
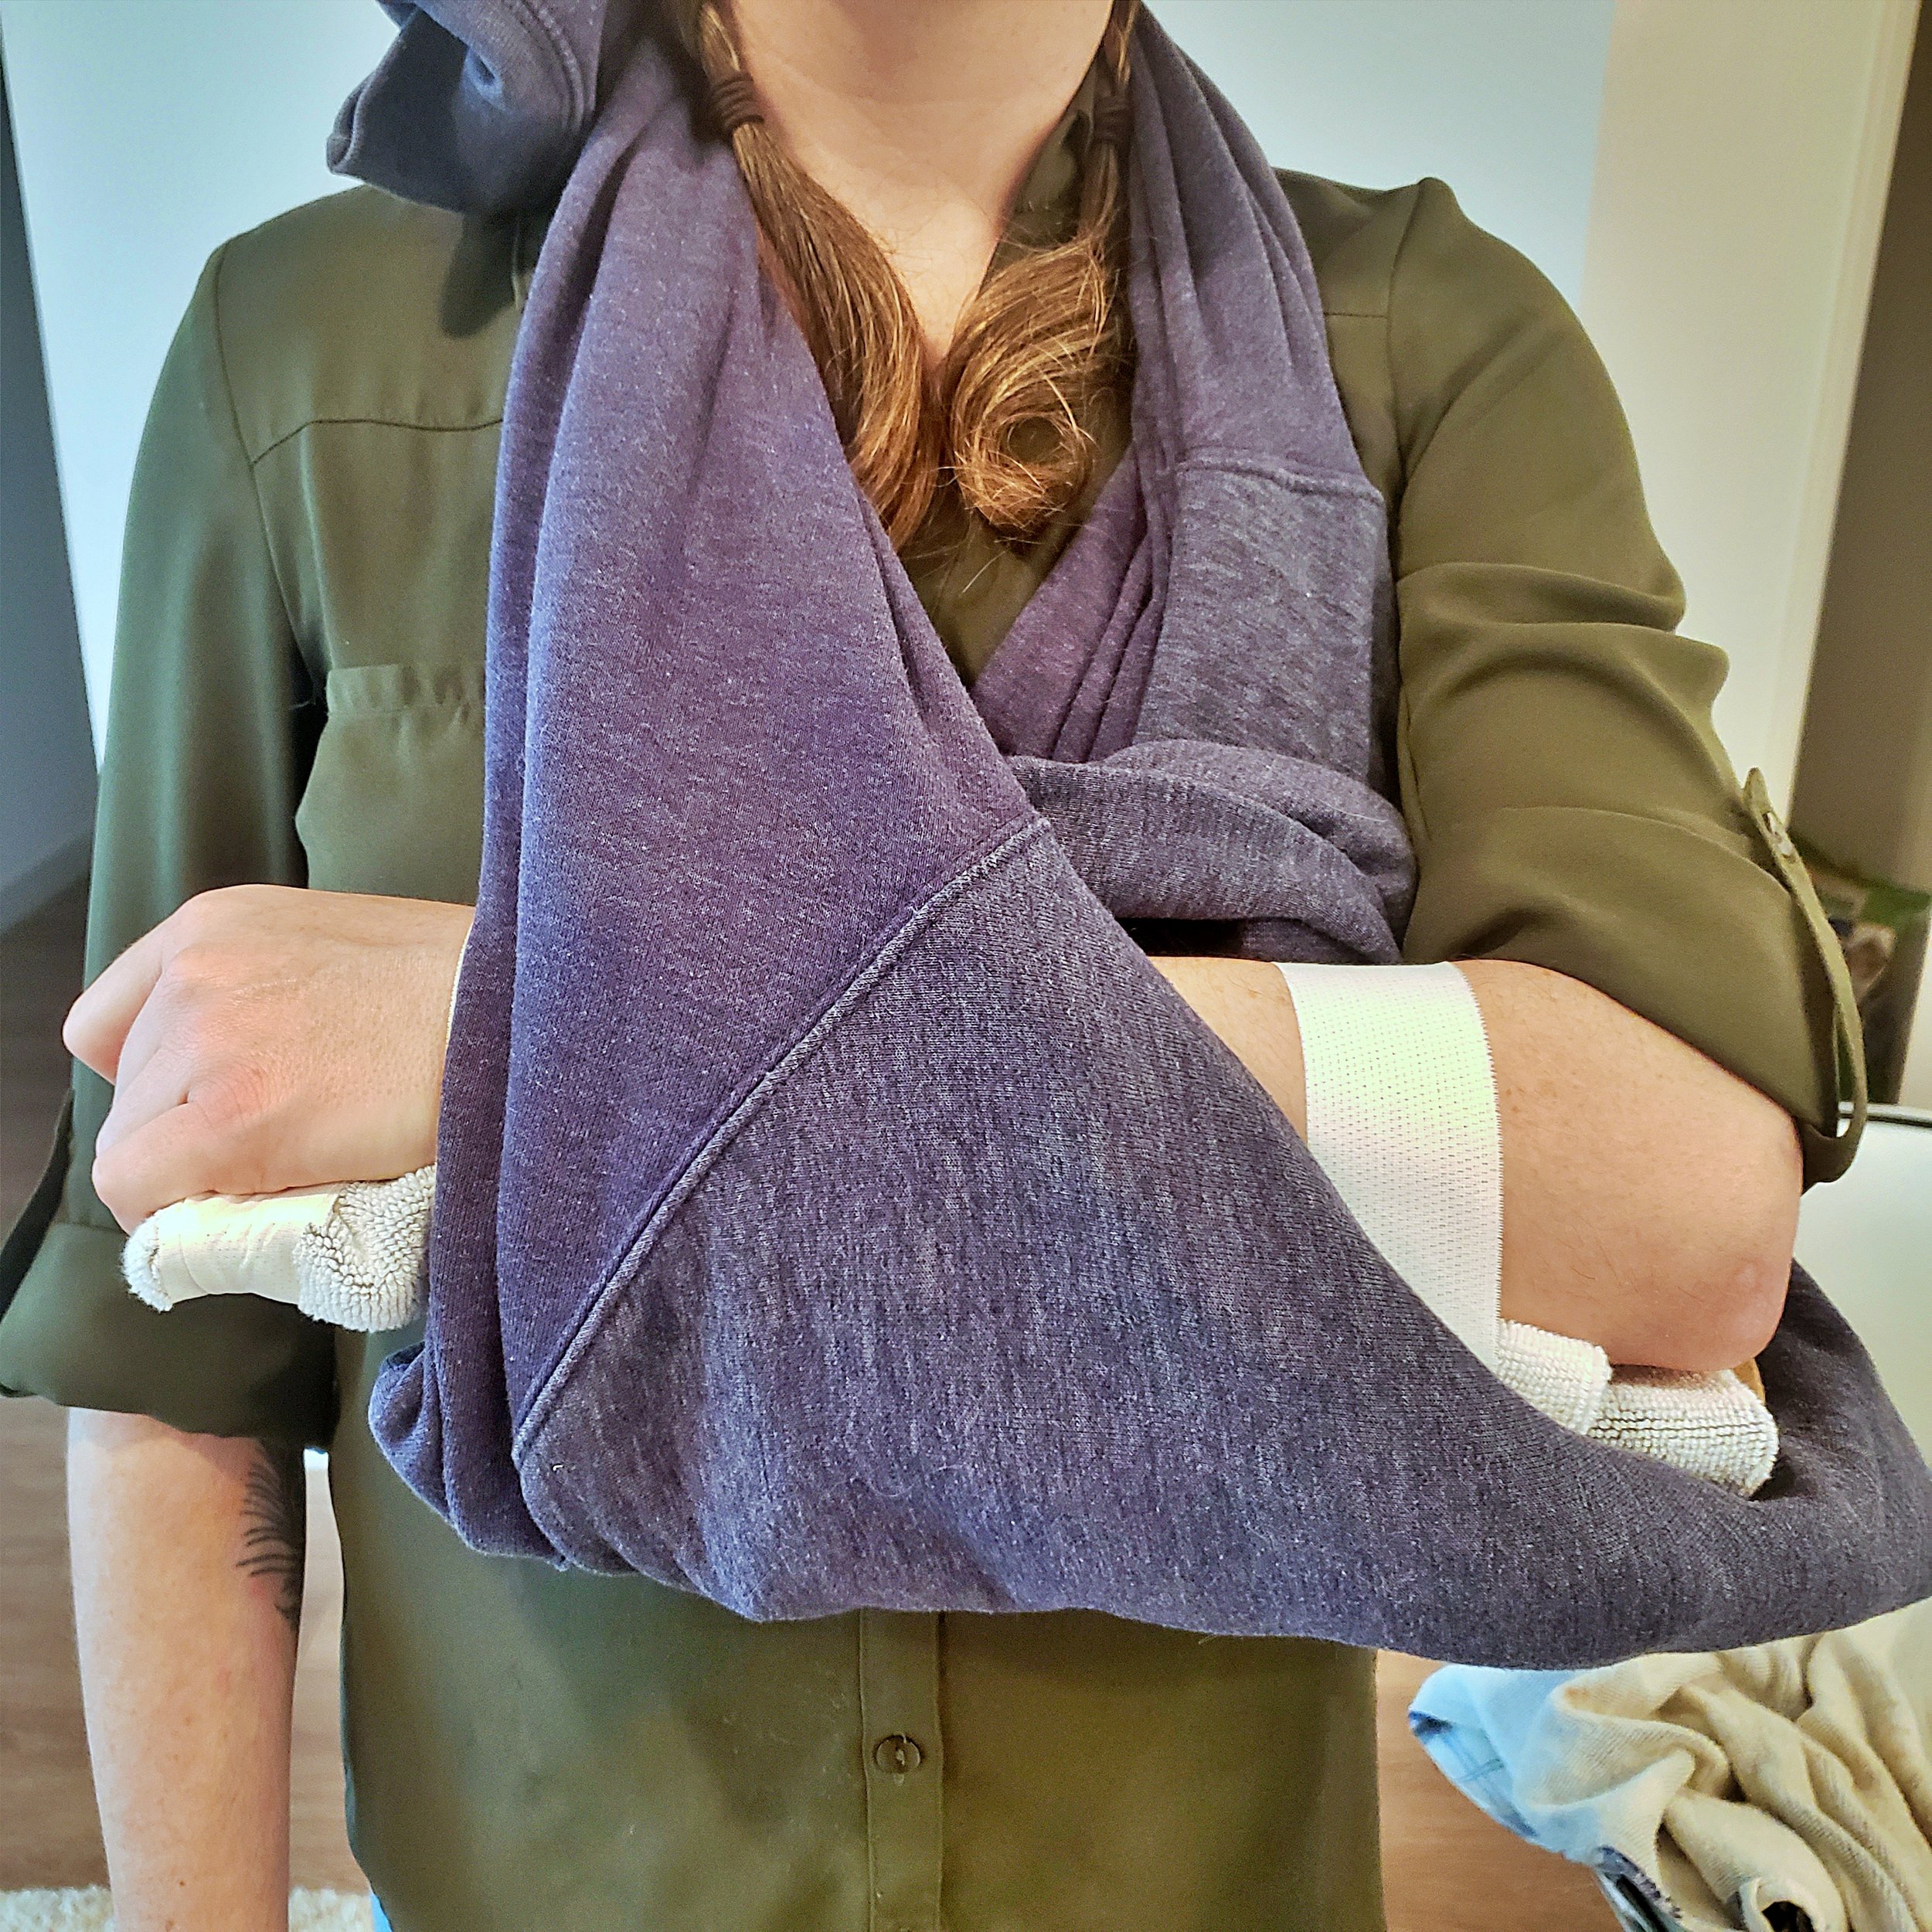
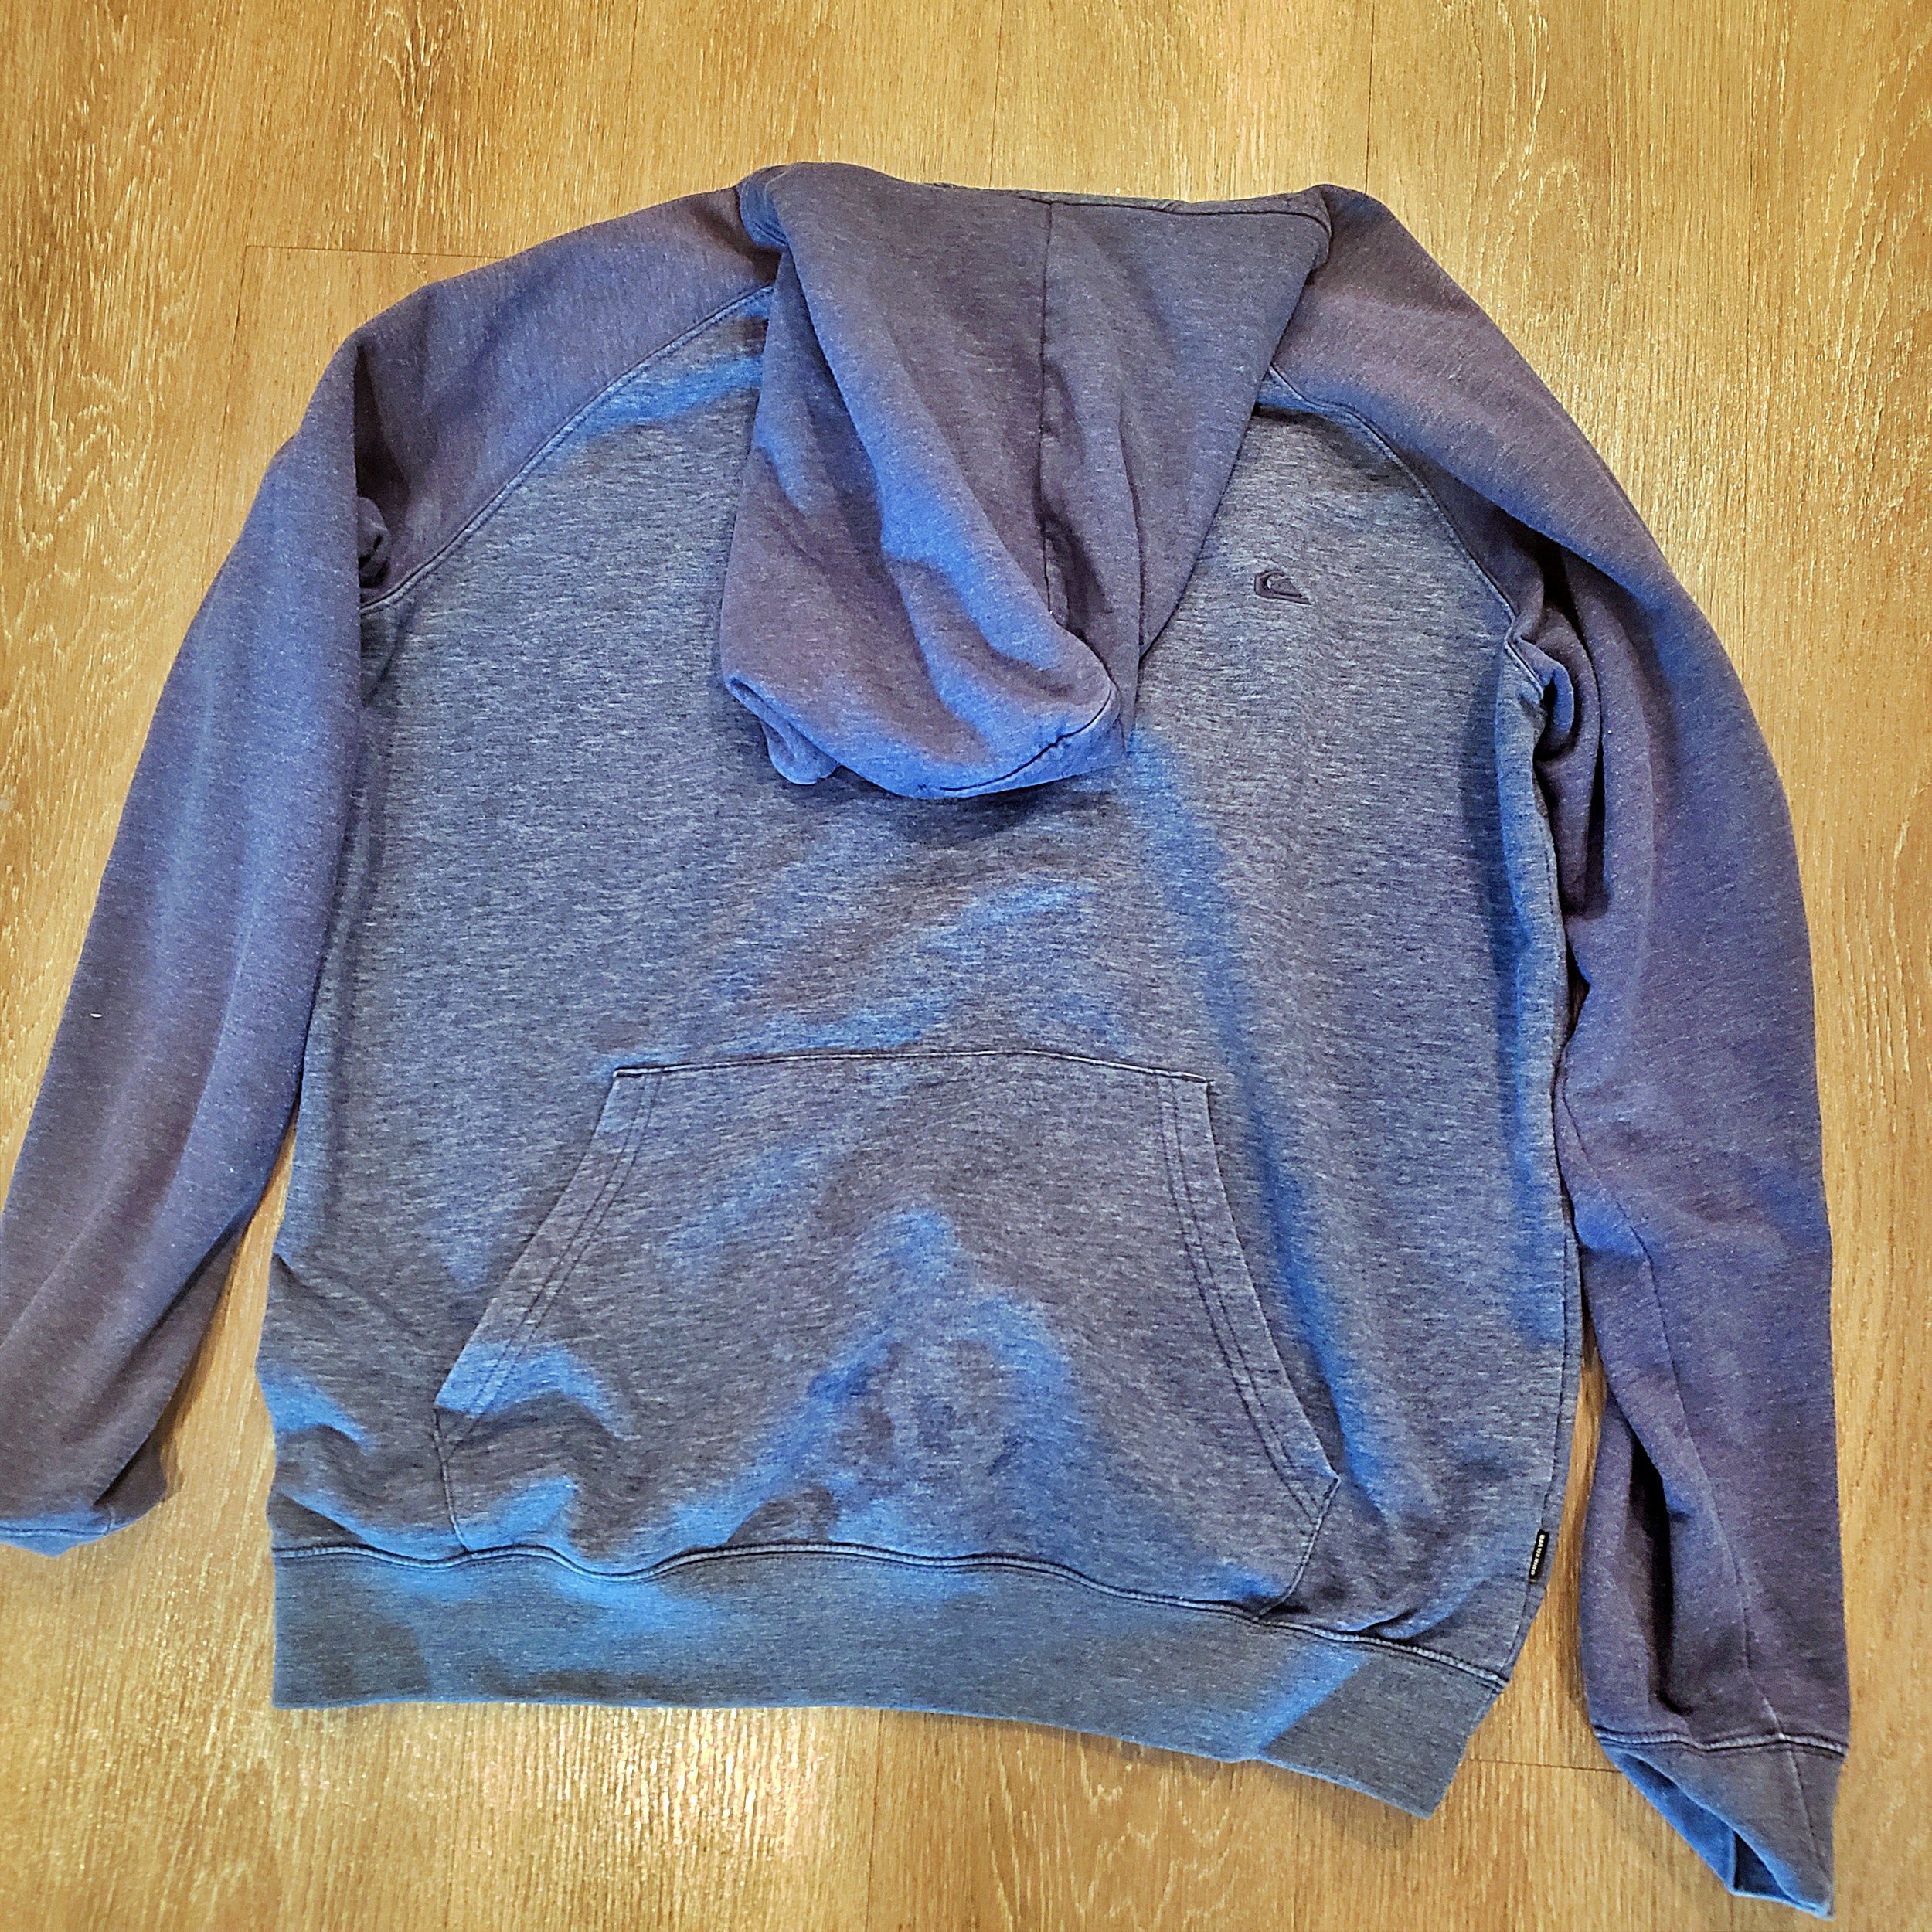
It is incredibly simple to form an improvised sling in the field. A scarf or a shirt will do. No reason why a tent fly or something similar would not work as well. It's survival, be creative with your improvisation.

A splint/sling is meant perform two functions: Prevent further injury, and minimize patient pain.

Position of function: The reason you see arms placed in this particular position when secured in a sling (across the diaphragm) is because this is the POF (Position Of Function) for; broken collar bones, broken or dislocated shoulders, and/or humerus breaks. The position of function is the optimal position too place an injured and splinted/casted limb in, as it allows for optimal perfusion to the limb (oxygen rich blood flow); which in turn allows for better healing, and can assist in avoiding loss of the limb. The position of function for the forearm, wrist, leg, and ankle are obviously different than the position seen here. Again, this is for the collar bone, shoulder, and upper arm. Restoring the limb to the POF also can reduce pain, which is important in managing injuries.

You can add a "swath" which wraps around the upper arm and torso, which keeps the limb from "flapping/bouncing" out from and against the body as the patient walk. Be sure it does not restrict the full rise of the chest, so something with stretch is best (shirt material, elastic bandage, etc).

Potential problems: When placing the arm in a sling, be sure the shoulder is not pulled upward or forward, which can happen if the sling is too small or too tightly applied.

Always check a "distal" pulse (a pulse below the site of the break, before and after applying an improvised splint. A break with no pulse is a medical emergency. In the case of an arm, use the "radial pulse" the pulse found at the wrist. If there is a pulse before you splint, but not after, remove the splint and check to see if the pulse is restored.

Collarbone breaks are the most common where "tenting" occurs, a cleanly broken bone pushing on the skin from underneath causing a deformity. Be careful with the limb, and add a swath, so the bone doesn't punch through the skin.

Contorted limbs: Take a wilderness first aid or greater course, so you can learn to apply "inline traction" which can restore a pulse to a pulseless limb, as well as place a contorted limb safely back into the position of function.

Hope this helps the people.

First Aid Tips: Assessing Eye Trauma

If the eye becomes injured in the field, swift and appropriate action must be taken to prevent its loss. During your assessment you will seek to determine what part of the eye was injured, to what depth, and its severity. Understanding the anatomy of the eye is important for these assessments, as injuries to certain areas should always raise red flags. Considering the MOI, what are the results of the following inspections:


  1. Try to determine if there is a “globe rupture”. A globe rupture is a loss of integrity of the outer membranes of the eye (sclera and cornea). Any full thickness injury to the sclera and/or cornea-be it blunt or penetrating-is considered a globe rupture. This is one of the most serious types of eye injury, and loss of the eye is a major possibility. If found, try not to let the patient move their eye. Signs include; a “peaked”/bulging pupil, a tear shaped pupil, a mass under-or hemorrhage of-the conjunctiva (the thin clear lining that covers the eye and the eyelids), loss of the iris (there will be no “colored” portion of the eye visible and the pupil may be abnormally large, loss of the lens.

2. Determine if the vision has been affected. Ask your patient if there is blurry vision, double vision, loss of depth perception, or a loss of vision all together.

Does the patient retain a normal field of vision? You should be able to see approx. 95 degrees outward (towards your ear) and approximately 60 degrees inward (towards your nose). You should be able to see 60 degrees up and 75 degrees down, from the center. This translates to a horizontal range of 155 degrees and vertical range of 135 degrees. Top test this, you can extend your forefinger in front of the patient, and ask them to track it with just their eyes (not moving their head). Slow move the finger to the left, then right, then up, then down, asking the patient to tell you when they can no longer see the finger in each field of view. Keep your finger at least 18” from their face when performing the exam.

Visual disturbances after a trauma to the eye are a serious red flag and may mean the retina is damaged. Trauma to the retina can result in blindness, and it requires immediate care. Some visual disturbances which are symptoms the retina is damaged or detached are; flashing lights (aka seeing stars ), floaters (specks, lines or cobwebs in your field of vision), and a shadow appearing in your peripheral vision.

3. Try to determine if there is damage to the bony structure around the eye. Palpate very gently and be especially aware of the presence of any crepitus, as this is a major red flag. Should one eye present as appearing larger than the other after damage to this area, a “blowout” fracture may have occurred. This is a major red flag.

4. Inspect the eyelid and the integrity of the integrity of cornea, sclera, & conjunctiva. Take note of any lacerations, blood, inflammation, redness, etc. You may gently pull the eyelids up and down respectively, and ask the patient to look up/down/left/right to inspect the eye and the lids further.

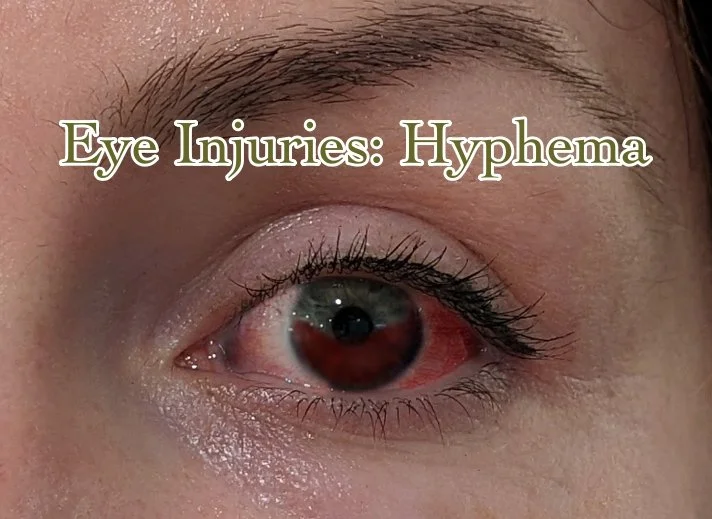
5. Is hyphema (blood in the chambers of the eye) present? This can occur on isolated areas of the eye, or cover the majority. Note the blood will be pooling inside the eye. This can cause very dangerous rises in pressure inside the eye.

6. If no penetrating trauma or globe ruptures are present, can the patient move the eye up, down, left, right? Remember to ask if there is pain or loss of vision when doing so.

7. Does the pupil still respond to light?

Eye injuries of any seriousness must be treated quickly. Should your assessment reveal anything other than mild irritation or lacerations to areas of least concern (the eyelid or outermost lens), then evacuation is highly recommended. Remember, if you must bandage one eye-and it is important for it not to move-then you must bandage both eyes, as they do not track independently.

Tips For Hiking In Steep Terrain

Catastrophic falls are one of the leading causes of injury and death in the outdoors, however many are quite preventable. Here are a few general safety tips for hiking in steep terrain.

*Ankle support. When hiking in steep terrain, use boots not shoes. There are plenty of "lightweight mids" that will fell like sneakers on your feet, but still support an ankle fatigued from hiking. You can even trail run in them.

*Soles. The more rocky and steep the hike, the more you should consider getting footwear with some good, sticky soles. Vibram soles are recognized by climbers, hikers, and soldiers alike for their durability and grip. They are also known for still being able to maintain traction when the stone/rock you are stepping on is wet.

*Do not go beyond barriers for better views or pictures. In Yosemite National Park and the Grand Canyon both, this is commonly how people accidentally go over cliffs and waterfalls. Follow the instructions on sinage.

*Stay away from the edge. These steep banks and cliffs are formed by erosion. Banks can be "undercut" and you never know how stable an edge is. 

*Crawl, don't climb. Rock "scrambles" are one thing, but never "ladder style" climb hillsides/cliffs/outcroppings with proper equipment and training. You can scramble down, but vertical pitches are nearly impossible to down climb without falling. The experience and weight distribution is completely different than up climbing.

*Remember to always let someone know your route, and when to expect your return when exploring the outdoors. The sooner the rescue is started the better, as you may be too incapacitated to call for yourself. 

*Always carry a proper first aid kit on the trail.

IMG_20201008_165608_363.jpg